

Rather than casting on a new piece separately and sewing it into place later, picking up stitches allows you to work directly from the edge of your knitting, creating a strong, neat join with very little finishing.
It's commonly used for adding sleeves, neckbands, button bands, collars and decorative edgings, and is a technique you'll use several times throughout The Pencil Cardigan. With a little care, you'll create an almost invisible join that blends beautifully into your knitting and gives your finished project a professional finish.
Using a knitting needle slightly smaller than the one used for the main garment helps produce a cleaner, neater edge before changing back to your original needle size.
You will need: • Your knitted piece • The needles used for the main project • A pair of knitting needles approximately 0.25mm smaller • Yarn to join
Good to know: A contrasting yarn has been used in these instructions to clearly illustrate the technique. When using the same colour yarn, any tiny imperfections are much less noticeable and the join blends beautifully into the finished knitting.
Steps
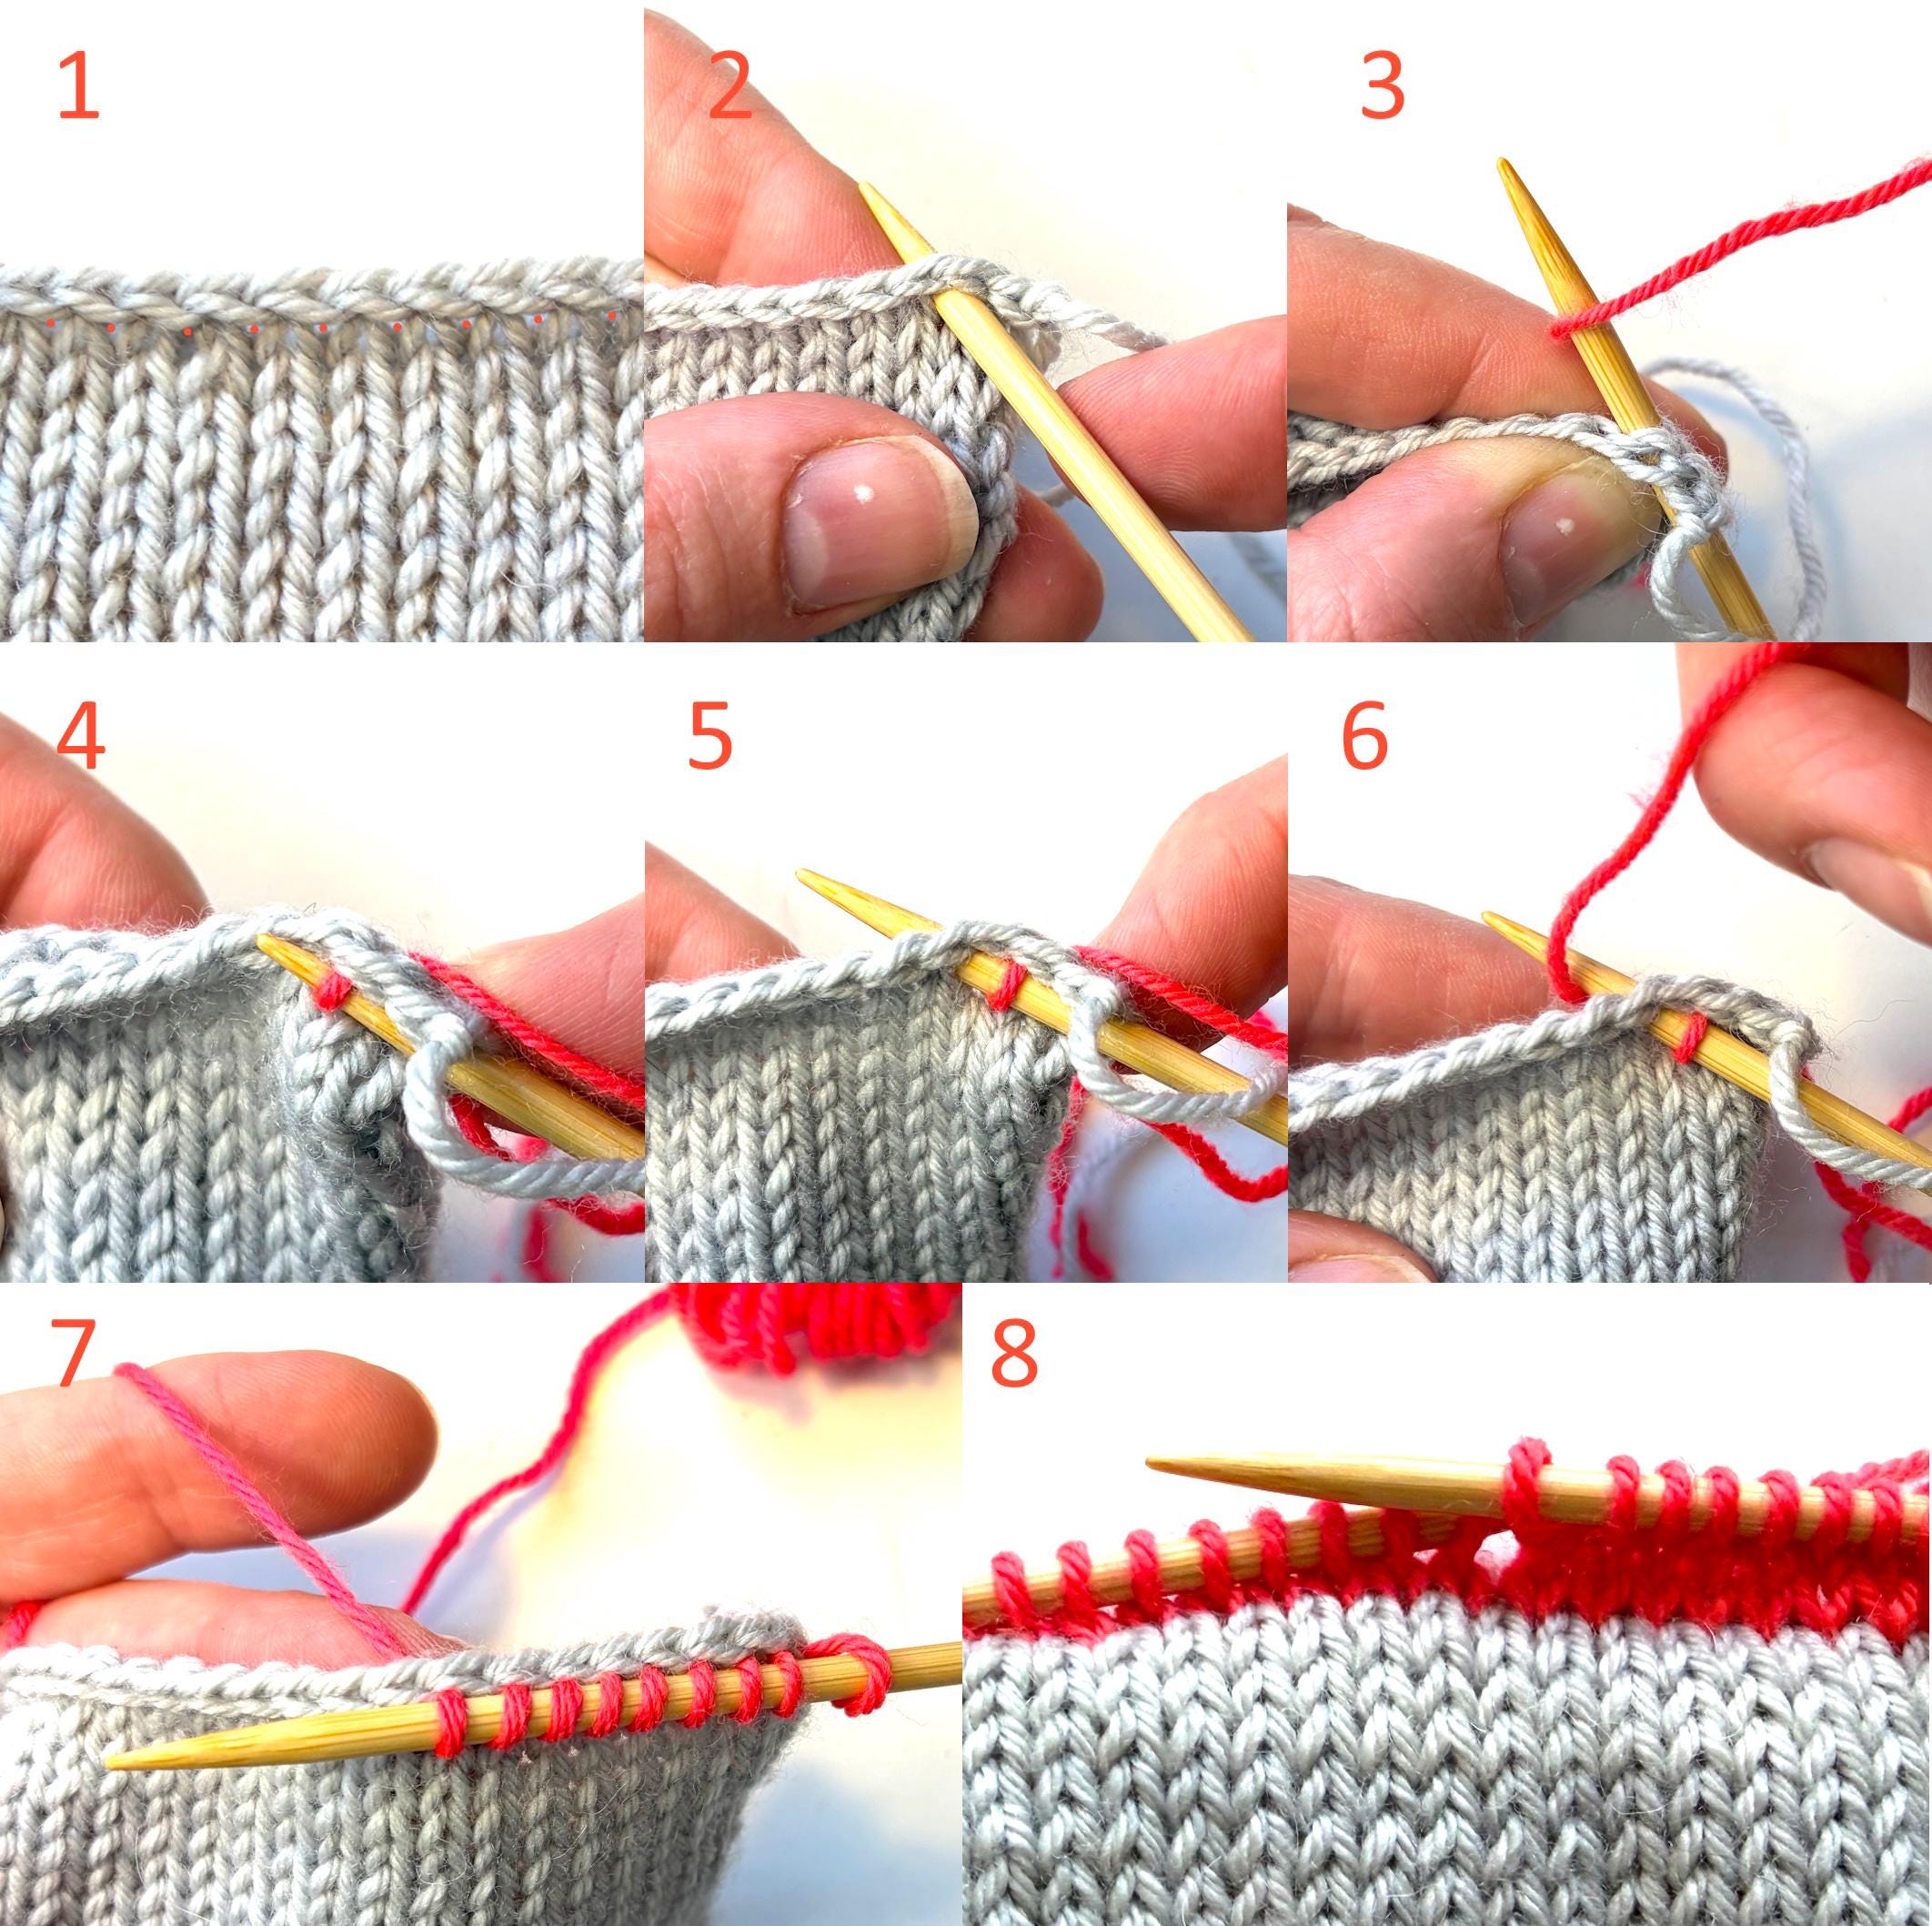
-
Work with the right side of your knitting facing you.
-
Identify the stitches you wish to pick up. In the photographs, I've used red dots to highlight the centre of each knitted V.
-
Hold your work in your left hand. With your right hand, insert the knitting needle knitwise (from front to back) through the centre of the first identified stitch.
-
Leaving a long tail to sew in later, wrap the joining yarn around the needle from bottom to top in an anti-clockwise direction, just as you would for a normal knit stitch. There's no need to knot the yarn at this stage – simply hold the tail against your work with your left hand.
-
Pull the wrapped yarn through to the front of the work to create your first picked-up stitch.
-
Insert the needle knitwise through the next identified stitch and repeat the process.
-
Continue across the edge until you've picked up the required number of stitches.
-
When you're ready to begin knitting the new section, change back to your original needle size.
Top Tip: Look closely and you'll notice that inserting your needle through the centre of each knitted V creates another matching V directly above it. This disguises the join beautifully, creating a seamless transition that will be almost invisible to all but the most experienced knitter.